
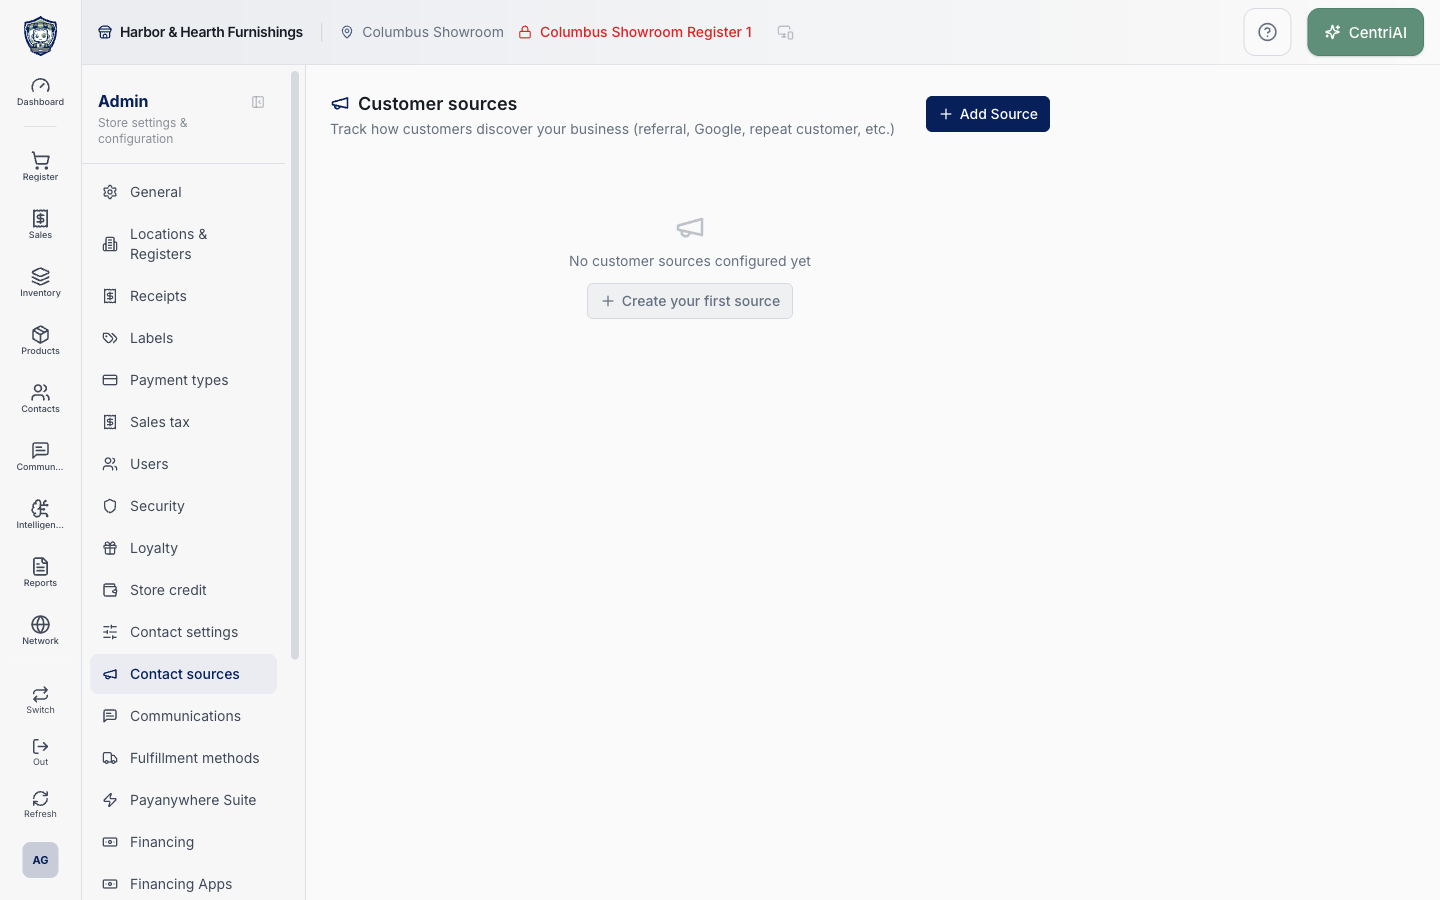
The navigation label is Contact sources with the Megaphone icon; the page heading is Customer sources. Every tenant member is permitted by the current database policy to view and manage these rows, so establish an internal owner before making changes. Trash does not delete a source—it sets Enabled off. Disabled sources remain in this Admin list with a Disabled badge but are excluded from the current Post-Interaction customer-source picker.
Before you beginUse an authorized administrator account and confirm the business shown in the top bar. Record the previous value before changing a live operational setting.
Step by step
- Go to Admin → Contact sources. Wait for loading to finish and confirm the Customer sources heading with the Megaphone icon.
- Review every existing name, description, Enabled state, and order before adding another. Names are unique within the business, and the page has no search, merge, usage count, or historical-attribution preview.
- Choose Add Source or, in the fully rendered empty state, Create your first source. Both open New Customer Source.
- Enter the required Name and optional Description. Use a stable origin such as Google / Maps, Referral, Event, or Repeat customer only when it matches the business’s attribution policy; avoid temporary campaign names unless reporting explicitly requires that granularity.
- Leave Enabled on when staff should be able to choose the source in supported interaction workflows. Choose Create once and wait for Source created. An exact duplicate tenant/name is rejected; read Failed to save instead of changing punctuation merely to bypass uniqueness.
- To revise a source, choose the pencil, update Name, Description, or Enabled, and choose Update. Wait for Source updated. Renaming changes the shared source label referenced by historical sales rather than creating a new historical snapshot.
- Understand the ordering behavior. Until any source has a manual sort value of 10,000 or more, the shared hook displays sources alphabetically. Dragging a row over another and ending the drag saves positions as 10,000, 10,010, 10,020, and so on, after which manual order takes precedence.
- Reorder on a pointer/drag-capable device. Source order saved confirms the writes. If any update fails, the page restores the previous local list and shows Failed to save source order. Verify the resulting order in the Post-Interaction source picker.
- Be careful when editing after reordering: the current upsert hook sends sort_order 0 when the edit form does not provide an order. Updating a source can therefore move that row ahead of manually ordered values on the next refresh. Recheck and drag the complete list back into the intended order after any edit.
- To retire a source, choose the trash icon. There is no confirmation dialog. The action updates is_enabled to false, shows Source deactivated, and keeps the row visible with Disabled; it does not delete the row or erase historical sale references.
- A disabled source is filtered out of the current Post-Interaction customer-source choices. If a sale context already carries that source ID, the interaction form may retain the ID internally but cannot resolve it as an enabled selected option; preserve historical meaning and use an approved replacement for new attribution.
- To restore a deactivated source, choose its pencil, turn Enabled on, and Update. There is no separate restore button.
- After creating, renaming, ordering, disabling, or restoring, open Communications → Post-Interaction Form and inspect the Customer source picker. Confirm only enabled sources appear, in the intended order, and run a controlled interaction attribution test before relying on reports.
Screen and contract reference
| Control or area | What it means |
|---|---|
| Megaphone icon | Exact navigation, heading, and empty-state icon for Contact/Customer sources. |
| Contact sources | Admin navigation label. |
| Customer sources | Page heading and attribution concept. |
| Add Source / Create your first source | Open the same New Customer Source dialog. |
| Name | Required trimmed tenant-wide unique source label. |
| Description | Optional explanation shown under the source in Admin. |
| Enabled | Controls availability in supported new-interaction selection; disabled rows remain in Admin. |
| Pencil | Opens Edit Source for name, description, and Enabled state. |
| Grip handle | Drag-and-drop ordering control; saves manual sort values after drag end. |
| Alphabetical fallback | Used until at least one row has a manual sort_order of 10,000 or more. |
| Manual order | Rows saved at 10-point increments starting at 10,000. |
| Edit-order caveat | Editing currently writes sort_order 0 when no explicit order is passed, so verify/reapply ordering afterward. |
| Trash icon | Immediately deactivates by setting is_enabled false; it does not hard-delete. |
| Disabled badge | Shows a retained source that is unavailable for new selection. |
| Post-Interaction picker | Uses enabled sources only and follows the shared sorted list. |
| Historical reference | Sales.customer_source_id points to the shared row; deactivation preserves it, while renaming changes the displayed shared label. |
| Harbor & Hearth screenshot | Real Amelia Grant capture of /admin/customer-sources in a fully rendered empty state. It shows the correct Megaphone icon and creation controls with no customer/source records or dialog exposed. |
Expected result
The source appears once in the active selection list and can be used consistently for attribution.
Troubleshooting
- Confirm you are changing the intended business and location before saving.
- Record the previous setting when a change affects live selling, payments, tax, or integrations.
- Use a controlled test record after saving before rolling the setting out broadly.
CentriPOS API explorer · API Center administration
More guides
Build an itemized payment in MoneyUse Products or Amount & description to build one receipt, attach the customer, and follow the appropriate payment or service-estimate workflow.
Take a one-time payment in Virtual TerminalReview a one-time amount, tax and contact at the correct payment station, use its verified secure checkout, and recover the original receipt after an uncertain result.
Review booking payments, refunds and earned careKeep a booking’s customer payments, unused advances, completed care, cancellation fees and refunds distinct, then read a correctly scoped accrual report.
Configure booking properties and customer pagesSet accommodations, service packages, availability, required intake and payment terms, then review the correctly branded booking page before sharing it.