
Product Tags uses the Tags icon in CentriPOS navigation. Tags are shared tenant-wide labels, not categories, brands, suppliers, product types, or online publication rules. Tag names must be unique within the business. Renaming keeps the same tag record and assignments; deleting is immediate, has no confirmation dialog, and removes that tag’s product assignments through the database relationship.
Before you beginSearch first to avoid duplicate products or reference values. Confirm whether the change is business-wide or location-specific.
Step by step
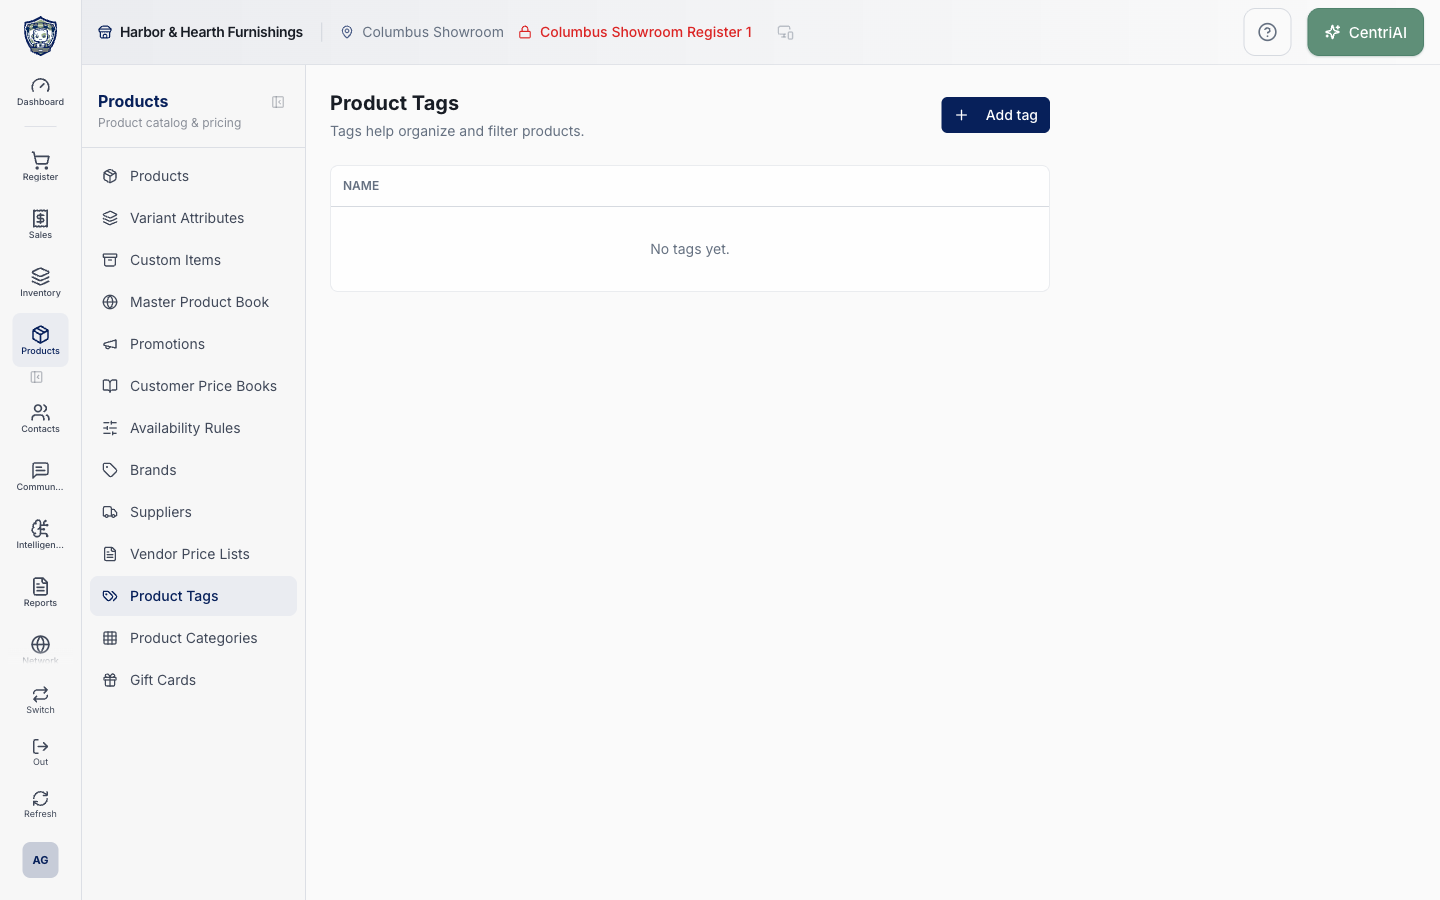
- Go to Products → Product Tags. Wait for loading to finish, then review the alphabetized Name table. The list is scoped to the current business. “No tags yet.” is a complete zero-tag state.
- Before adding a label, search the visible list manually for the intended wording and check whether a category, brand, supplier, product type, or existing tag already represents the same concept. The page itself has no search, usage count, merge, or duplicate-cleanup tool.
- Choose Add tag. Enter one concise reusable Name; surrounding whitespace is trimmed. Add tag stays disabled until the name contains non-space text. Choose Add tag once and wait for Tag added.
- If the database rejects the name, read the error toast. Names are unique per tenant, so an exact existing value cannot be added twice; case behavior follows the stored database value and should not be used to create near-duplicates.
- To assign tags to one product, open Products, create or edit the product, and find Tags in Product Details. Search the existing tag, choose it, and save the product. The selected tag appears as a removable badge.
- If no result matches in the product Tags search, choose Create “name” only when a new tenant-wide tag is intended. Inline creation adds the tag and selects it for that product; the product still must be saved for its assignments to persist.
- To assign or remove a tag across several products, select the exact rows in Products and use the bulk tag action. Adding ignores duplicate product/tag links; removing deletes that tag association from the selected products. Verify the selection count and affected products before applying.
- To rename a tag, choose its table row or Edit pencil, change Name, and choose Save. Wait for Tag updated, then verify representative product records and filters show the new name. Renaming edits the shared tag rather than creating a second label.
- Before deletion, identify every product using the tag from the Products workflow or another approved audit. The Product Tags list does not show assignment counts or affected products. Record a replacement plan if the label supports operations or online merchandising.
- Choose the trash icon only when the shared tag and all of its product associations should be removed. The delete request runs immediately with no confirmation dialog and no undo/restore control on this screen; successful completion shows Deleted and removes the row.
- After any add, rename, assignment, bulk change, or deletion, reopen representative products and verify their Tags badges and the intended supported product filtering. A tag label alone does not change price, stock, tax, category, brand, supplier, product type, POS availability, or online publication.
Screen and contract reference
| Control or area | What it means |
|---|---|
| Tags icon | Exact CentriPOS navigation icon for Product Tags. |
| Name table | Alphabetized tenant tag list with one canonical name per row. |
| Add tag | Opens /catalog/tags/new and a one-field creation dialog. |
| Name | Required trimmed tenant-wide label. An exact duplicate is rejected by the tenant/name uniqueness rule. |
| Add tag button | Creates the new tag; it does not assign the tag to any product by itself. |
| Row / Edit pencil | Opens the shared tag editor. |
| Save | Renames the existing tag and preserves its ID and product relationships. |
| Trash icon | Immediately deletes the tag without confirmation; its product-tag associations cascade away. |
| No tags yet. | Fully rendered empty state, not a loading error. |
| Product Details → Tags | Searchable individual-product assignment control with removable selected badges. |
| Create “name” | Inline product-editor action that creates and selects a new tenant-wide tag when no exact result exists. |
| Bulk tag action | Adds or removes one tag association across the selected Products rows. |
| Assignment | Many-to-many relationship between a product and a shared tag; creating a tag alone creates no assignment. |
| Not a behavior switch | Tags do not independently alter pricing, inventory, taxability, categorization, supplier, product type, selling channel, or publication state. |
| Harbor & Hearth screenshot | Real Amelia Grant capture of /catalog/tags in the fully rendered No tags yet state. It safely shows the Tags heading, Add tag control, Name table, and empty state without exposing product records. |
Expected result
The tag appears once in Product Tags and can be found on the intended products and supported filters.
Troubleshooting
- Confirm whether you are editing a product, variant, shared master record, or location-specific value.
- Search for an existing product, SKU, UPC, attribute, or tag before creating a duplicate.
- Preview labels, pricing, and availability in the intended location before broad publication.
CentriPOS API explorer · API Center administration
More guides
Build an itemized payment in MoneyUse Products or Amount & description to build one receipt, attach the customer, and follow the appropriate payment or service-estimate workflow.
Take a one-time payment in Virtual TerminalReview a one-time amount, tax and contact at the correct payment station, use its verified secure checkout, and recover the original receipt after an uncertain result.
Review booking payments, refunds and earned careKeep a booking’s customer payments, unused advances, completed care, cancellation fees and refunds distinct, then read a correctly scoped accrual report.
Configure booking properties and customer pagesSet accommodations, service packages, availability, required intake and payment terms, then review the correctly branded booking page before sharing it.