
Admin → Receipts uses the Receipt icon. The system POS Default is locked and recoverable; duplicate it to customize. The builder has no rendered receipt preview and most edits remain unsaved until Save. Logo upload writes a public media object immediately but still requires Save to attach its URL to the template. Templates can expose customer contact/balance data, gift-card code/balance/expiry, policies, barcodes, and captured signatures—enable only what policy and recipient privacy allow.
Before you beginUse an authorized administrator account and confirm the business shown in the top bar. Record the previous value before changing a live operational setting.
Step by step
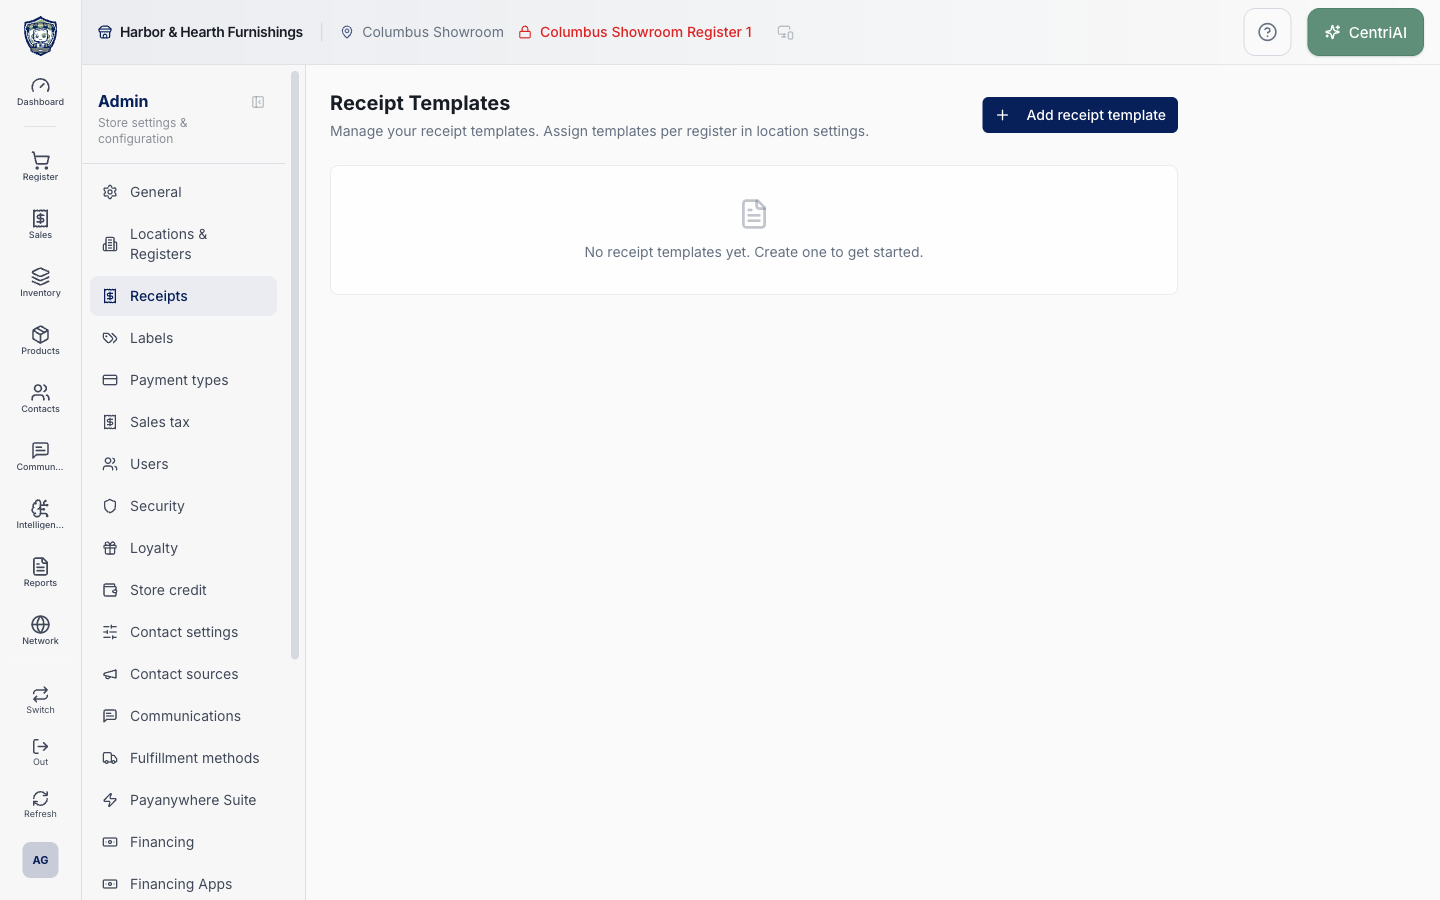
- Go to Admin → Receipts. Wait for loading, then review Template name, Template style, Width, Receipts visibility, POS Default badge, and row actions. “No receipt templates yet” is a completed empty state; Add receipt template creates New Receipt Template immediately as thermal 80 mm and opens its editor.
- Understand the POS Default. It cannot be edited or deleted. Its list-row switch can immediately change only the default print style between Thermal receipt (using existing width or 80 mm) and 8.5 x 11. Duplicate template creates an unlocked <name> Copy with all copied content but is_default false and no automatic register assignment.
- For non-default templates, choose the row pencil. Set a distinct Name, Output format Thermal receipt or 8.5 x 11 paper, and, for thermal, 80 mm countertop or 58 mm compact width. There is no live print/PDF/email preview inside the builder.
- Under Logo, choose Use storefront logo, Custom logo, or No logo. Inherit uses the tenant General-setup logo. A custom image opens the 2.4:1 crop tool, then uploads PNG to a public product-media path immediately and updates the draft URL. Save the template to retain the attachment. Removing the draft logo does not delete the uploaded storage object.
- Use Quick header builder cautiously. It can copy selected business name, location name, register name, address, phone, email, and website into rich HTML. Business/address/contact values come from tenant General settings; location/register names are prefilled only when exactly one assigned location/register is detected. Shared multi-location/register templates leave those names blank by default.
- Choose Replace header with selected details to overwrite header_html, Add selected details to append, or Clear header. These are draft operations. The copied header is a snapshot and does not automatically follow later tenant/location/register changes; reapply and save when source details change.
- Edit Header content directly when needed. Review all text, links, and embedded images as customer-visible content. Use Receipt number prefix only as template display wording; do not assume it changes the register’s underlying receipt counter/numbering policy.
- Under Cashier label, choose whether to Show who processed the sale and set its label. Decide whether exposing the staff display identity is appropriate on printed, emailed, downloaded, text-linked, and public receipts.
- Under Line Item Display, select Name + SKU, Name only, or SKU only. Separately choose Show line item discounts and Show tax breakdown per item. Test variable/custom items, returns, discounts, and tax rounding rather than relying on labels alone.
- Under Totals & Labels, set Subtotal, Grand total, Change given, and Amount due wording. Enable Print tax summary and its label only when it matches accounting/tax policy. Enable Print gift card details only when card number, balance, and expiry may safely appear on every applicable receipt format and recipient.
- Under Customer Details, turn Include customer section on/off and select Full name, Company/organization, Account number, Email, Phone, Mailing address, and Account & store credit balances. Apply data minimization: balances and contact/address fields are sensitive and may travel through print, email, text link, PDF, screenshots, or forwarded public links.
- Under Policies & Fine Print, Use store policies replaces the draft with the current General-setup store policy HTML; Add store policies appends it. Use register policy override is available only when exactly one assigned register has usable policy text. Shared templates across multiple registers cannot auto-select one override.
- Add signature line inserts a printable blank line and the current signature label into policy HTML; it does not capture an electronic signature. Clear fine print removes the draft. Store/register shortcut content is copied, not linked, so later policy edits do not update this template automatically. Review legal text with the business’s authorized policy owner.
- Use Footer Message for approved closing content and optionally Print scannable sale barcode. The barcode helps staff find a sale but also exposes an encoded sale identifier; test scanning and handling under receipt privacy policy.
- Under Captured Signature, Print signature on receipt includes an already saved checkout signature and lets you set the label above it. This is separate from the blank signature line shortcut. Do not expose biometric/signature evidence without consent, retention, and delivery-channel approval.
- Under Email Delivery, set the customer-facing subject line; the receipt number is added automatically. Avoid unnecessary customer or transaction details in the subject because email metadata can be broadly visible.
- Choose Save once and wait for Template saved. Cancel/Back leaves without invoking Save, but any uploaded media object may already exist. Reopen the template and confirm the persisted values.
- Back in the list, Receipts visibility controls whether a template is Shown or Hidden in the Receipts selection context. With only one template it is Always shown and the switch is disabled. This visibility setting is not the same as assigning the template to a register.
- Go to Admin → Locations & Registers, open each intended register, and assign the custom receipt template. A duplicated/new template is not assigned automatically. Do not reuse a location-specific header/policy template across mismatched registers without reviewing its customer-visible content.
- To delete a non-default template, use Trash from the list or Delete this template in the editor. Confirm the named template; registers using it revert to the default. There is no restore. Preserve required historical/policy evidence and verify affected register assignments before deletion.
- Run controlled sales for every assigned register and relevant scenario. Inspect thermal 58/80 mm or letter print, Receipts reprint/selection, email, text/public link, PDF/download, customer/no-customer, discounts/tax, partial/account balance, gift card (only if operational), fulfillment, return, barcode, policy, staff label, and captured signature. Confirm actual output—not just saved settings—before launch.
Screen and contract reference
| Control or area | What it means |
|---|---|
| Receipt icon | Exact Admin navigation icon for Receipt Templates. |
| POS Default | Locked recoverable system template; duplicate to customize. |
| Default style switch | Immediate list action changing default thermal versus 8.5 x 11 output. |
| Add receipt template | Immediately creates an unlocked New Receipt Template, thermal 80 mm, then opens it. |
| Duplicate | Copies template content to <name> Copy, removes Default state, and does not assign registers. |
| Output format | Thermal receipt or 8.5 x 11 paper. |
| Paper width | 80 mm countertop or 58 mm compact for thermal templates. |
| Logo mode | Inherit storefront, custom public uploaded logo, or no logo. |
| Logo upload | Uploads cropped PNG immediately; Save is still required to persist template reference. |
| Quick header builder | Copies selected current identity/contact values into header HTML; it is not dynamically linked. |
| Replace / Add / Clear header | Overwrite, append, or clear draft header content. |
| Receipt number prefix | Display configuration, not proven receipt-counter mutation. |
| Cashier label | Controls whether/how the sale processor identity appears. |
| Line item display | Name + SKU, Name only, or SKU only. |
| Line item discount / tax per line | Independent customer-visible detail toggles. |
| Totals labels | Custom labels for subtotal, total, change, and amount due. |
| Tax summary | Optional aggregate tax display and label. |
| Gift card details | Can print card number, balance, and expiry; high-sensitivity setting. |
| Customer fields | Name, company, account number, email, phone, address, balances. |
| Policy shortcuts | Copy current store or single-register policy HTML into the draft; no ongoing linkage. |
| Add signature line | Printable blank sign-off line, not electronic capture. |
| Sale barcode | Scannable receipt identifier for later lookup. |
| Captured signature | Optional rendering of an already saved customer signature. |
| Email subject | Customer email subject with receipt number added automatically. |
| Save | Persists draft fields; no in-builder output preview. |
| Receipts visibility | Shown/Hidden selection availability; not register assignment. |
| Register assignment | Separate Admin → Locations & Registers configuration. |
| Delete | Non-default only; confirmed permanent deletion makes assigned registers revert to default. |
| Harbor & Hearth screenshot | Real Amelia Grant capture of /admin/receipts in a fully rendered no-template state. No editor, receipt, customer, policy, signature, or register details are exposed. |
Expected result
The saved template produces a test receipt with the intended branding, fields, policy text, and delivery behavior.
Troubleshooting
- Confirm you are changing the intended business and location before saving.
- Record the previous setting when a change affects live selling, payments, tax, or integrations.
- Use a controlled test record after saving before rolling the setting out broadly.
CentriPOS API explorer · API Center administration
More guides
Build an itemized payment in MoneyUse Products or Amount & description to build one receipt, attach the customer, and follow the appropriate payment or service-estimate workflow.
Take a one-time payment in Virtual TerminalReview a one-time amount, tax and contact at the correct payment station, use its verified secure checkout, and recover the original receipt after an uncertain result.
Review booking payments, refunds and earned careKeep a booking’s customer payments, unused advances, completed care, cancellation fees and refunds distinct, then read a correctly scoped accrual report.
Configure booking properties and customer pagesSet accommodations, service packages, availability, required intake and payment terms, then review the correctly branded booking page before sharing it.